Tectum Replacement Guide – Composite Tectum Planks
Composite Tectum Plank Replacement Guide
At Tectum Replacement, our goal is to equip contractors and construction professionals with the resources needed to complete Composite Tectum Plank repair and replacement projects efficiently and with confidence. This guide provides general installation information for Composite Tectum Plank systems, but this is not intended to address every project condition, assembly configuration, or application you may come across in your project. For project-specific questions or if you need additional assistance, reach out to our team today.
Before You Begin
Thoroughly review all project drawings, specifications, and jobsite documentation before beginning installation to reduce the risk of errors, omissions, or conflicts. Any discrepancies, questions, or missing information you come across should be clarified with the architect or engineer of record before work begins. During installation, maintain appropriate safety practices and comply with all applicable job site safety requirements when handling and installing Tectum roof deck products.
Installing Composite Tectum Planks
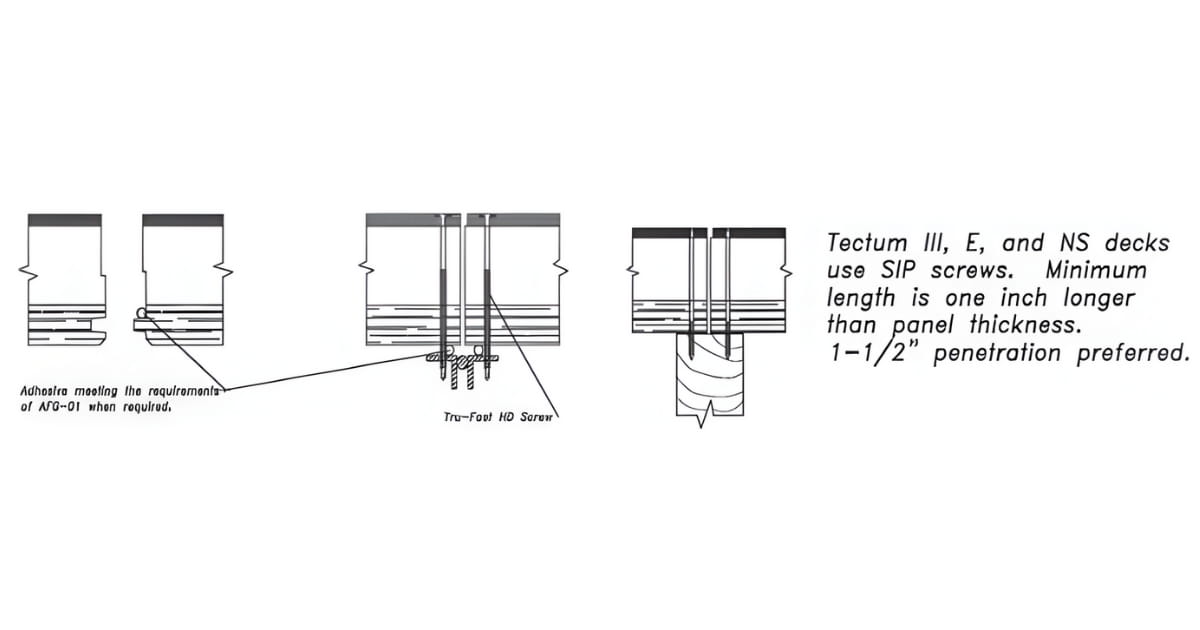
Composite Tectum Panels are made from a combination of Tectum, insulation board, and plywood to form a composite panel. Unlike Tectum I Planks, composite panels do not utilize tongue-and-groove joints and are installed as individual units. Each panel needs to be fully supported on structural members at all required points to meet your project-specific design requirements, approved contract documents, and manufacturer installation criteria.
Screw Placements
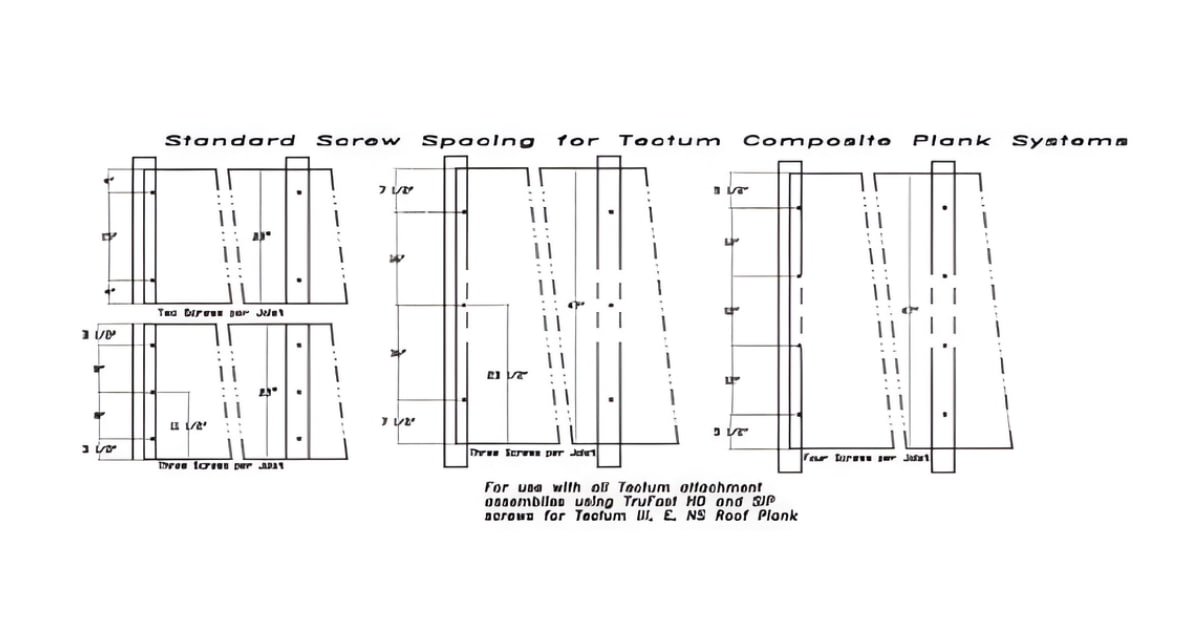
Screw attachment requirements can vary based on panel width and project-specific design criteria. For typical conditions, 47-inch-wide panels generally require three to four screws per bearing. Final screw quantities and spacing are determined for each project by the approved contract documents, project specifications, and manufacturer installation requirements. Additional fasteners may be required where dictated by uplift, shear, or other structural considerations.
Openings In Tectum Composite Roof Deck Panels
All openings in Tectum composite roof deck panels larger than eight inches in any direction need to be framed. Composite Tectum Panels must be mechanically fastened to the framing in accordance with your project’s approved contract documents. Fastener spacing is determined by your project’s uplift and diaphragm shear requirements, with typical framing attachment shown at approximately 12 inches on center unless more restrictive criteria apply.
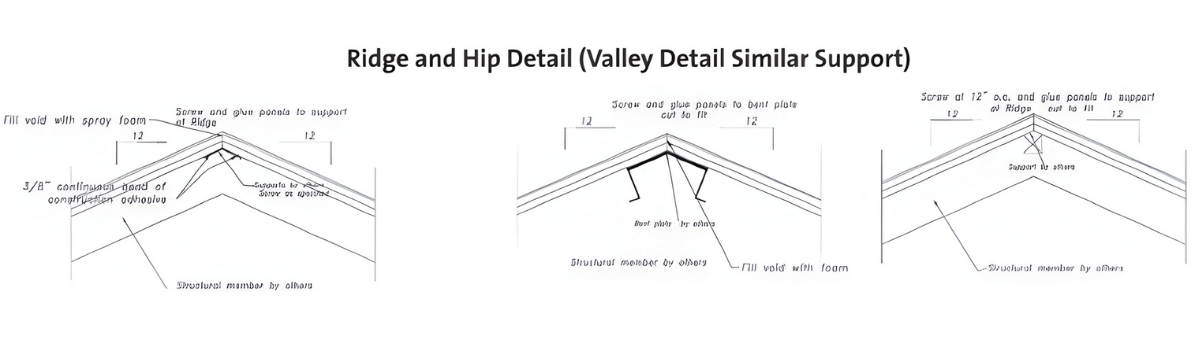
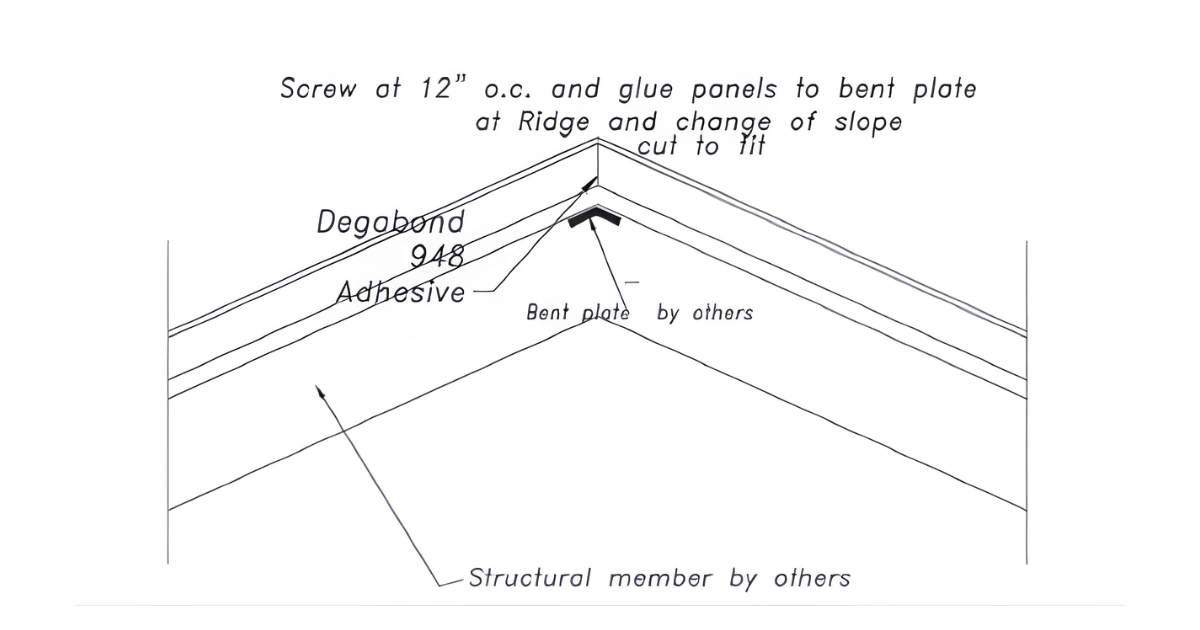
Transitions and Perimeter Support
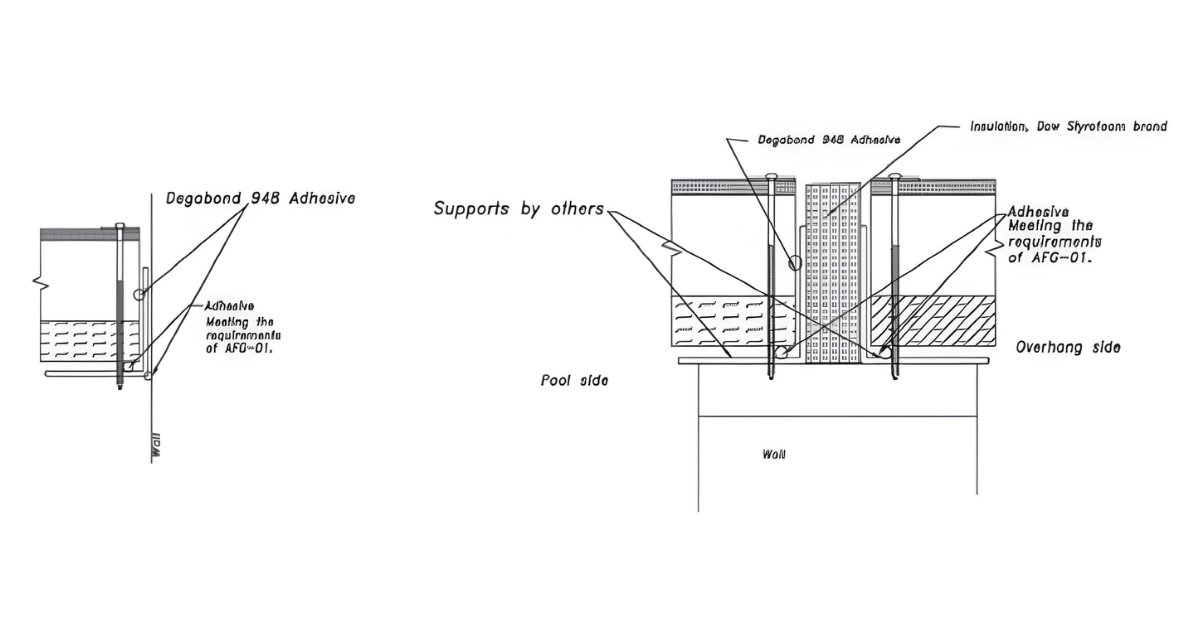
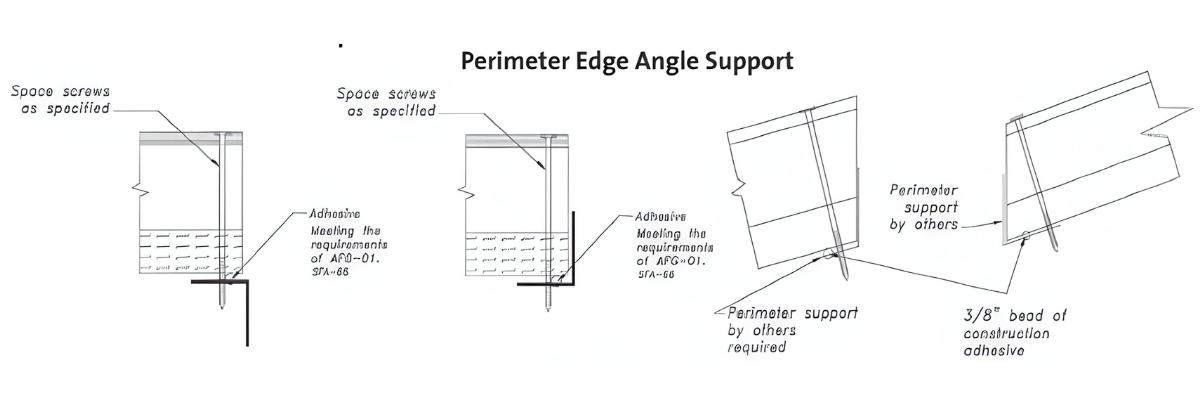
All perimeters and transition areas using Tectum composite planks need to be fully supported. Perimeter conditions, as well as hips, valleys, and ridges, must have the appropriate structural support in accordance with your approved contract documents. Where changes in slope do not exceed ½ inch in 12 inches in either direction, the long edge of the panel may be installed across the transition. When panel orientation is perpendicular to a change in slope, continuous support is required.
Tectum IIIP Roof Plank Guidance
Because Tectum IIIP is designed for high-humidity areas, the differences between these and Tectum III are the panel perimeter details in the graphics to the right. While similar in overall construction to Tectum III panels, Tectum IIIP panels incorporate modified perimeter details, and these panels include perimeter slots that need to be filled with an insulated key joint and sealed with a continuous bead of construction adhesive. At building perimeters where panels terminate at walls, insulation beyond the panel edge is still required in accordance with the approved design. Panels shall also be properly insulated at openings and sealed at ridge conditions to support effective thermal and moisture performance.
")