Tectum Replacement Guide – Tectum I Tiles
Tectum I Tile Replacement Guide
Tectum I tiles are designed for use with bulb tees, requiring different installation steps than Tectum I planks or long-span planks. This guide is designed to assist contractors with installing Tectum I tiles in their replacement or repair projects. Learn more about Tectum I and order your tiles or planks with our team online today.
Table of Contents
Before You Begin
Before installing Tectum I tiles, contractors need to review the documentation of the project and job site, including drawings, plans, and job site plans. Reviewing these documents is essential to lowering the risk of errors or issues, and once these documents have been reviewed, it is crucial to clarify questions or omissions with the architect or engineer. During your installation project, be sure to maintain basic precautions and safety standards.
Positioning and Attaching Tees
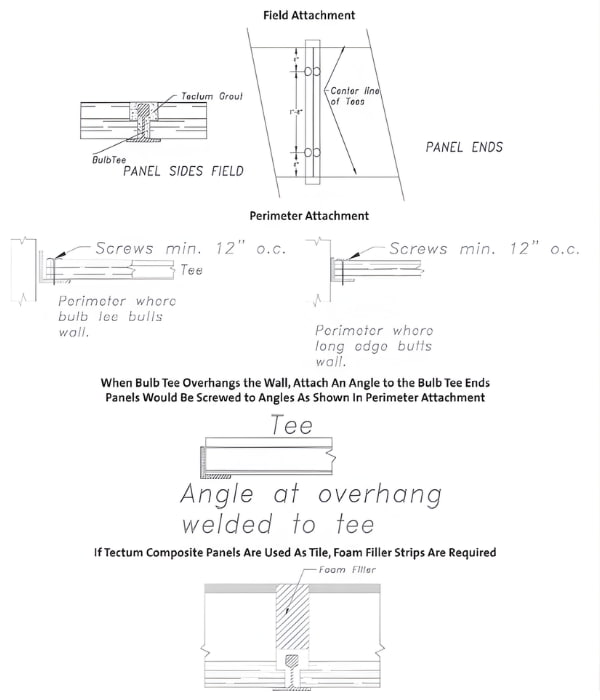
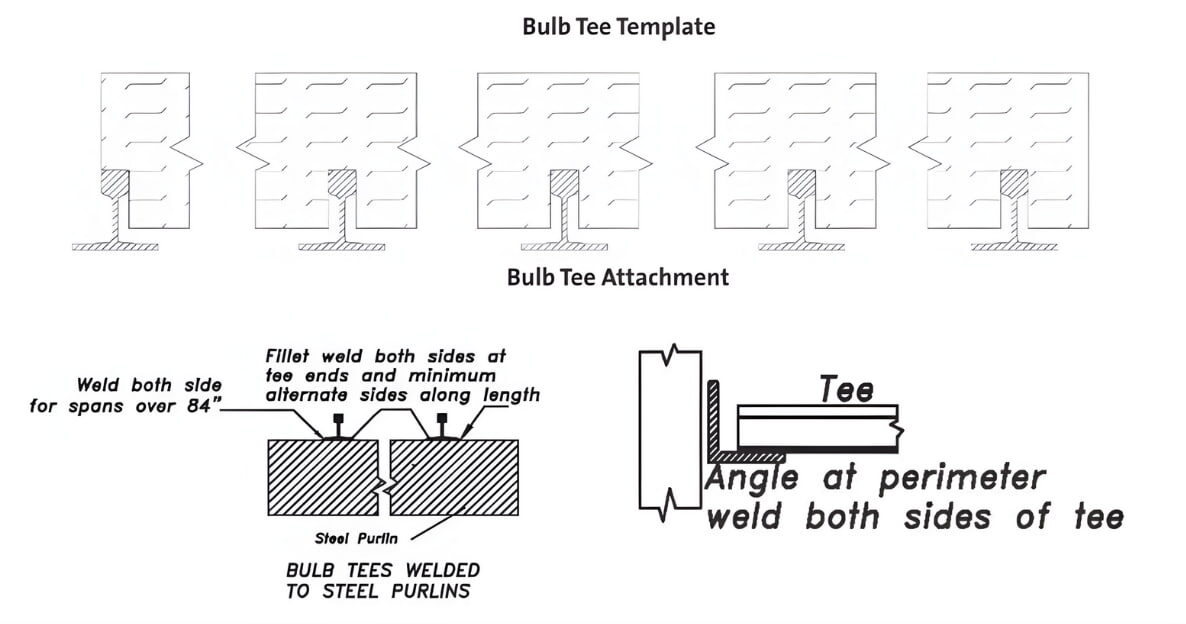
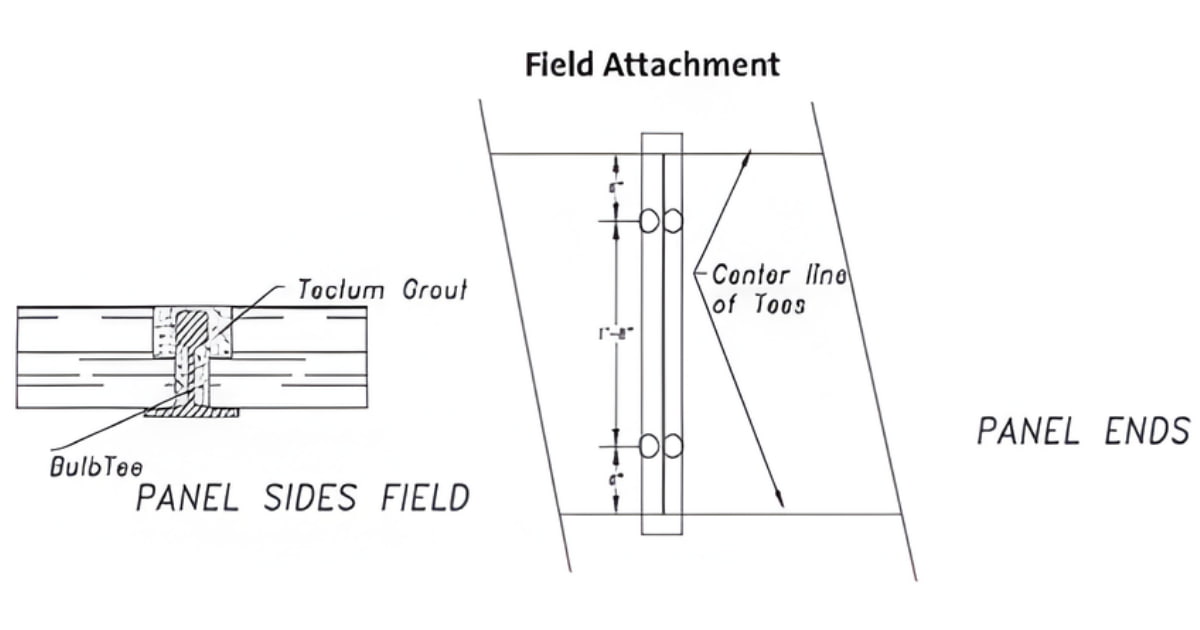
Bulb tees for attachment should be spaced according to the specifications and securely positioned. Tee ends must fall over supports and have a minimum 1” bearing. On each side, at the tee ends, a fillet weld of a minimum of ¾” is required. The same ¾” weld is also required at the intermediate supports on alternate sides for spans of 84” or less and on both sides for spans greater than 84”. Tees are typically spaced at 24” or 32”on center.
Welding Plate Attachments
When tee ends fall on masonry, they must be secured by suitable means, usually with a welding plate attached to the masonry. Additionally, welding plates can be used when laying tees on wood purlins. These welding plates should be screwed to the purlins at 24” and 32” centers, ensuring that the tees are welded to the plates or punched to accept screws. Screws need to be a minimum of 14 gauge with a minimum of 1 ½” penetration, and two screws are required per tee end with two required at each intermediate support.
Laying Tectum Tile Between Bulb Tees
Tectum roof tile should be laid with the long dimension parallel to the bulb tee sub purlins. Each tile needs to be spaced evenly between the bulb tees with a minimum ½” edge bearing. When tongue and groove ends are used, the ends should be staggered by half the panel length. For sloped roof deck projects, the tile spacing must be carefully checked when tees are placed parallel to the ridge since the Tectum deck will naturally bear more on the lower bulb tee. Temporary shimming may be needed to maintain equal bearing and grout on both side of the tile in these instances. Once laid, the roof tile should be cut to fit at perimeters and transitions, and continuous support is required at all transitions. A carbide-tipped saw is recommended for cutting Tectum I roof tile.
Anchoring Tectum Tiles
To anchor the Tectum I tiles, the open joints between the roof tile and the bulb tee should be filled with Tectum grout prior to insulation or roofing material application. After the grout is poured, it should be leveled, and filler strips may be required for thicker Tectum tile. A special hoe or trowel is recommended to level the grout and provide the proper depth for the filler strip. When square end panels are used, Tectum I roof tile ends must fall over the bulb tee supports. Roof tile ends are screwed to the bulb tee supports. When tongue and groove roof tile is used, the tongue and groove should be adhered together with a 3⁄8” bead of construction adhesive while tiles are screwed to the bulb tee supports at each crossing. A bead of adhesive over the structural supports may also be required before the tile is placed and screwed, and grout should fill the entire space between the bulb tee and the roof tile. Scrape off the excess to form a flush joint with the top surface of the joint.
")